By Andrew McDonald
10th May 2017
Posted in Laravel, PHP
In my last post, Testing In Laravel, I spoke about the importance of functionality testing during large scale projects and how we can achieve this via the tools that come packaged with Laravel.
In that post I gave an example of a very simple Laravel test, where it will click a link and see if the page is redirected to a login page.
In this part we will create a test for the actual submission of a form and test both an instance of a failure and a successful login.
So based upon what we did in the last part, we should have the default login page provided by Laravel with nothing in it, which look like the below:
< !DOCTYPE html>
<html>
    <head>
        <title>Laravel</title>

        <link href="https://fonts.googleapis.com/css?family=Lato:100" rel="stylesheet" type="text/css"/>

        <style>
            html, body {
                height: 100%;
            }

            body {
                margin: 0;
                padding: 0;
                width: 100%;
                display: table;
                font-weight: 100;
                font-family: 'Lato';
            }

            .container {
                text-align: center;
                display: table-cell;
                vertical-align: middle;
            }

            .content {
                text-align: center;
                display: inline-block;
            }

            .title {
                font-size: 96px;
            }
        </style>
    </head>
    <body>
        <div class="container">
            <div class="content">

            </div>
        </div>
    </body>
</html>
So let’s start by creating the actual login form:
 <div class="container">
            <div class="content">
                <form action="" method="POST" role="form">
                    <div class="form-group">
                        <label for="">Email</label>
                        <input type="text" name="email" class="form-control" value="{{ old('email') }}" id=""/>
                    </div>

                    <div class="form-group">
                        <label for="">Password</label>
                        <input type="password" name="password" class="form-control" value="{{ old('password') }}" id=""/>
                    </div>

                    <input type="hidden" name="_token" value="{{ csrf_token() }}" />

                    <button type="submit" class="btn btn-primary pull-right" value="Login" name="Login"></button><span class="icon icon-login" aria-hidden="true"></span> Sign in

                </form>
           </div>
 </div>
Nothing fancy here, just a simple login form with a username and password field. We are using the built-in Laravel Authentication for all of the verification process.
Next, we create a simple login success page to redirect to if the login is a success and tell the authenticator to post back to itself on a failed login. These are then both added to the AuthController.
    protected $redirectPath = '/successLogin';
    protected $loginPath = '/login';
We now have a simple login form that will take us to a page when we log in successfully or redirect back to the log in page for a failed login. We can now set about creating the unit test for this login procedure.
The first step is to of course create a new file to house our test. It is usually best practice to try to separate out tests for different aspects of the site into separate files and to try and avoid having a file containing a lot of tests.
use Illuminate\Foundation\Testing\WithoutMiddleware;
use Illuminate\Foundation\Testing\DatabaseMigrations;
use Illuminate\Foundation\Testing\DatabaseTransactions;

class LoginFormTest extends TestCase
{
    /**
     * A basic functional test example.
     *
     * @return void
     */
    public function testLogin()
    {

    }
}
Now let’s work out what we need to do in order to login to the site, and in doing so create a list of these steps.
- Go to the login page.
- Enter a username.
- Enter a password.
- Click submit.
The first step we can create using what we already learned from the previous tutorial.
    public function testLogin()
    {
        $this->visit('/login')
    }
The second step requires us to use another of Laravel’s built in helper functions , the ->type([INPUT TEXT], [NAME OF FORM FIELD]) function will allow us to type into text fields on the form.
And so the test will now look like the following:
    public function testLogin()
    {
        $this->visit('/login')
        $this->type("andy@test.com", 'email');
        $this->type("password123", 'password');
    }
We can now use the ->press([BUTTON TEXT]) helper function to submit the form and finally add ->seePageis([PAGE URL]) function to check we have been redirected correctly.
    public function testLogin()
    {
        $this->visit('/login')
        $this->type("andy@test.com", 'email');
        $this->type("", 'password');
        $this->press('Login');
        $this->seePageIs('/successLogin');
    }
If we now run the test we can see that it has passed. Now we could leave the test alone, after all it is successfully testing a login process using the hard-coded values we provided, but what if the user is removed or their password is altered? That would mean the test would fail.
So how do we go about protecting against these issues? Well, we could create a special user that will only be used for tests and cannot be altered, however this would mean an extra user having to be stored that is used exclusively for our tests.
Using Laravel’s DatabaseTransactions functionality we are able to create a user for the test which will then be removed once the test is over so lets take a look at achieving this.
The first thing we are going to do is tell our test class to use DatabaseTransactions and set up the namespace.
use Illuminate\Foundation\Testing\DatabaseTransactions;

class LoginFormTest extends TestCase
{
    use DatabaseTransactions;
This tells the test to manipulate the database during the tests but to then rollback the database after they are complete.
To create the temporary user object we will need to create a factory method for it. All object factories are stored in the database/factories/ModelFactory.php directory and are essentially closures that define how to create a new object.
$factory->define(App\User::class, function (Faker\Generator $faker) {
    $faker = Faker\Factory::create('en_GB');
    return [
        'email' => $faker->email
    ];
});
The above code is a factory method for the User class. Within the closure we are defining a $faker object. Faker is a class that creates random data for input for many different use cases. See the documentation relating to it to see what other data types can be created.
In this case we are assigning the email variable a faker email address, so if we go back to our test we can now tell it to create a user object using the user factory we just created. In order to keep things organised let’s create a new function called createTestModels that can create all the models that we need for the tests.
class LoginFormTest extends TestCase
{
    use DatabaseTransactions;

    private $user = null;
    private $plainTextPassword = '';

    private function createTestModels()
       {
        $faker = Faker\Factory::create('en_GB');
        $this->plainTextPassword = $faker->password;

        $user = factory(App\User::class)->make();
        $user->password = Hash::make($this->plainTextPassword);
        $user->save();
        $this->user = $user;
       }
So in the above we instantiate the faker object and assign the test’s private variable plainTextPassword. After that we use the user factory we created to create a temporary $user object and then assign that to the test’s private $user variable.
Now that we have set up our user object we can use this to test the login process.
  public function testLogin()
    {
        $this->createTestModels();

        $this->visit('/login')
        $this->type($this->user->email, 'email');
        $this->type($this->plainTextPassword, 'password');
        $this->press('Login');
        $this->seePageIs('/successLogin');
    }
So now if we run the test it will temporarily create a user object, log in with it, and when it finishes it will remove the user from the database.
Lastly in order to ensure that we have definitely logged in and have the relevant user session running we can add $this->assertTrue([STATEMENT TO BE PROVED]) to the end of the test, and so now the final test looks like this:
  public function testLogin()
    {
        $this->createTestModels();

        $this->visit('/login')
        $this->type($this->user->email, 'email');
        $this->type($this->plainTextPassword, 'password');
        $this->press('Login');
        $this->seePageIs('/successLogin');
        $this->assertTrue(Auth::user()->id == $this->user->id);
    }
The assert true ensures that the current Auth object is equal to the user we have created for the login process.
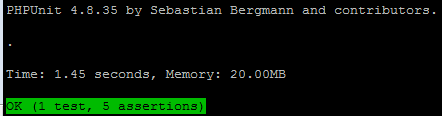
And so we have now successfully created a test for our login form using a temporary user object that will be created and destroyed in conjunction with the test’s life-cycle.
Next time we will look at how to create a test on a component that uses JavaScript.