By Andrew McDonald
21st March 2017
Posted in Laravel, PHP, Web Dev
The importance of functionality testing during large scale projects cannot be underestimated and is even more important while using version control. What happens if the lovely login process you have just completed suddenly stops working because another developer has inadvertently uploaded new functionality that, while not directly influencing your login process, has still caused it to break?
One way to go about fixing this would be by testing all elements of the site after every commit to the repository – this is a long and time consuming process which can be inefficient.
But what if we could automate this process creating a script that runs through all the vital functionality and checks that everything is working correctly before committing the work to the repository?
Well, with Laravel we can. And what’s even better is that it already comes packaged with all the tools we need to create it as well as some helper functions to make it even simpler.
Firstly, in order to guide you through Laravel’s testing platform I have created a blank Laravel project where you can find all the info to do so here.
Now let’s create a unit test – you can create a user test by using the artisan command:
php artisan make:test [TESTNAME]
This will create a new test in the tests directory with all of the namespaces and includes needed.
Another way would be to just create a new file in the tests directory and copy the code provided in the ExampleTest.php file that comes as standard in Laravel. If you choose this method you must ensure that the filename ends in test, for example our test will be called TutorialTest.php.
Whichever method you chose you should now have a file that looks like the following:
use Illuminate\Foundation\Testing\WithoutMiddleware;
use Illuminate\Foundation\Testing\DatabaseMigrations;
use Illuminate\Foundation\Testing\DatabaseTransactions;

class TutorialTest extends TestCase
{

}
The class name is whatever we defined the filename to be. So in the case of TutorialTest this extends the Testcase Class which is the main driver in the Laravel test platform.
Now that we have our test file we can start thinking about what tests we want to perform. A simple test to start with would be to go to a page and check to see it contains a phrase.
To help us achieve this Laravel has many many helper functions whose naming conventions are very much like pseudo-code. So to visit a page we would use the function $this->visit('[URL]') and to see a phrase on the page we would use $this->see('[PHRASE]');.
By using these two functions we can now create a test that will ‘visit’ the homepage and ‘see’ if the phrase “hello world” is present.
class TutorialTest extends TestCase
{
  $this->visit('/')
       ->see('Hello world');
}
So now that we have our first test, let’s run it using the phpunit command. (When you run phpunit it may not find the executable needed – if this happens you can run vendor/bin/phpunit to point it to the executable needed).
And the test has come back as failed.
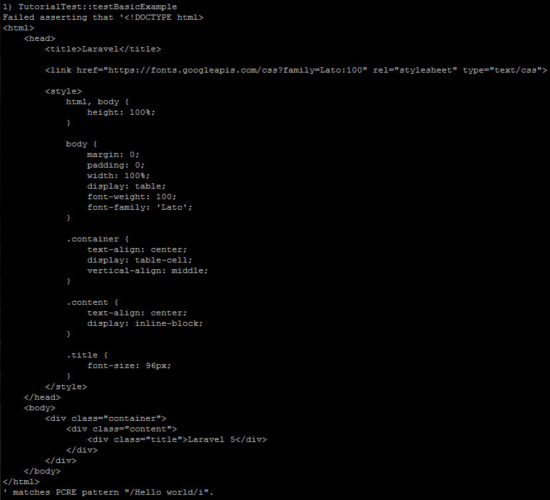
But why? The message provided informs us that the test was unable to find the phrase “Hello world” in the page provided, and sure enough there is no reference to “Hello world” on the page. So let’s remedy this by adding the text to the page.
  <div class="container">
     <div class="content">
        <div class="title">Hello world</div>
     </div>
  </div>
As you can see we’ve now replaced the sentence “Laravel 5” with “Hello world”, so let’s run the test again.
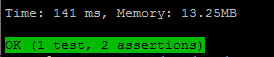
The test has now succeeded.
So let’s do one more simple test – this time we want to go to the homepage, click on a link and check that it sends us to the right url.
Let’s start by creating the link we want to press in the homepage.
  <div class="container">
    <div class="content">
      <div class="title">Hello world</div>
      <p><a href="/login">login</a></p><p>
    </p></div>
  </div>
Next, we need to setup the route and the subsequent view.
Route::get('/login', function () {
    return view('login');
});
Now we have everything we need for the test, let’s create the test. Start off by creating a new function with the name of the test.
The best practice is to be as descriptive of the test as possible – just make sure to start the function name with test.
    public function testLinkToTheLoginPageFromTheHomePage()
    {

    }
Ok, so let’s think of what we need to test and work through it. Firstly we need to go to the homepage, which we already know how to do from the previous example.
    public function testLinkToTheLoginPageFromTheHomePage()
    {
       $this->visit('/');
    }
Next, we need to click the link on the homepage. We achieve this with another Laravel helper function ->click([LINK TEXT]). Our link has the text “login” so adding this to our test looks like this:
    public function testLinkToTheLoginPageFromTheHomePage()
    {
       $this->visit('/')
            ->click('login');
    }
The last part of the test is to see if the link has taken us to the correct page. We can do this with yet another Laravel helper function ->seePageIs([PAGE URL]).
    public function testLinkToTheLoginPageFromTheHomePage()
    {
       $this->visit('/')
            ->click('login')
            ->seePageIs('login');
    }
And we have completed our test. We go to the homepage click the link named login, and check that we are on the login page. So let’s run the test and see what happens.
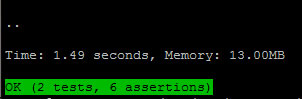
It was a success.
As well as the helper functions that Laravel provides with it’s testing API, Laravel also provides a few additional assertion methods for PHPUnit tests which we will look into in a future post as well as testing a simple login form.